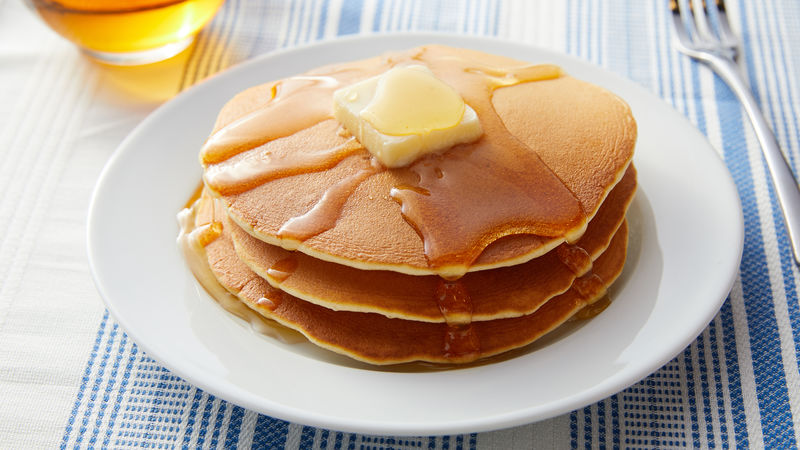
There’s something so beautiful about a thick stack of pancakes, sitting on a plate, drizzling with maple syrup and oozing with melted butter, waiting for you to dig into them, yelling at you “Look at me, I’m delicious!”
A couple years ago, my Dad wanted perfect fluffy pancakes. So what did he do? He made his own recipe for thick, fluffy, pancakes.
My Dad’s Perfect Pancake recipe
1 1/2 cups flour
1/2 cup sugar
1 egg
2 teaspoons baking powder
1 tablespoon oil
1 1/2 cups milk
Mix dry ingredients.
Mix wet ingredients.
Combine.
Heat up the pan to medium-high and DON’T BUTTER THE PAN!!!!
Once the pan is hot, pour a little of the batter on to test if it’s hot enough.
If it’s too thin, add more flour.
Scrape pan well, to make sure there’s no burnt parts.
Pour another cake, making sure to scrape in between cakes.
Once the bubbles come to the top, flip it. It’ll splatter. If it doesn’t, it won’t be as fluffy.
Mass production!
If you have your own pancake recipe, don’t mind that it says ‘perfect’ up there. You’ll probably disagree with that bold statement.
I love pancakes, even more than waffles, and if you have fresh blueberries or strawberries, THROW EM ON THERE!!! Unfortunately, we don’t really have fresh berries on hand, so I don’t get this luxury much.
I honestly thought that whipped cream was easy, because I’ve done it a million times, and I love it over and over, each time I make it. I would take out the hand mixer and the little whisks and beat it. It was fun. When I was six-ish, I had the dream of opening a bakery where my kids would eat whipped cream while I would do the, uh, baking.
Cream is usually over whipped. It’s not supposed to be crumbly. Properly whipped cream is supposed to be smooth, not grainy. Stiff Peaks is a misleading name.
over whipped cream
I learned that whipping cream isn’t exactly a piece of cake. My sister made whipped cream for her first time on Saturday, (No insult intended, Isabel) and she accidentally made it too sweet and over whipped. Also, I should have given her some piping tips. (Puns intended.)
I usually whip cream to the point where you can see the beater marks, and it’s kinda glossy. And if you remove the whisks, it just barely stays stiff. This works well for me, but depending on what you’re doing, you may want less or maybe more. I wouldn’t go any more than the previously described stage, but if you’re coloring your whipped cream REALIZE THAT AS YOU MIX IN THAT COLOR WITH A SPOON, YOU ARE CONTINUING TO BEAT IT!!!! YOU ARE WARNED! Usually I don’t really color the whipped cream, because white is SO PRETTY.
Softly whipped cream is my favorite for most desserts that aren’t cupcakes. I like to dollop (I say dollop, but I really use a piping bag and a closed star tip) softly whipped cream over chocolate mousse and on other desserts that don’t need a very stiff whipped cream. Cupcakes and strawberry mousses both use stiff whipped cream.
For softly whipped cream, it’s when you just barely see the beater marks, and they only slightly hold their shape. They look SO FLUFFY!!!
For as long as I’ve known of the famous Rubik’s cube, I’ve loved trying to get each and every side perfectly. I was also really wondered on how the mini cubes don’t fall off the cube when you’re turning, which is still a puzzle I haven’t solved yet. 🤷♀️ But I have solved the cube itself. It’s actually (and I can barely believe I’m saying this) not that hard… if you have the instructions right in front of you….
I know that people do cube competitions and they are probably not looking at directions. Someday, I’d like to try that with Asher. Maybe. I’ve memorized some of the process (up to step 3), but not all the algorithms.
Rubik must have not only been a genius, but had superpowers. I mean, since when does anyone come up with stuff like this?! I bet that until he wrote up how to solve it, he couldn’t.
I’ve only solved it twice, but it is SO MUCH fun. And really, who doesn’t like trying to solve it, getting faster and faster and being a show-off? I know I do.
Comment if you’ve been able to solve the cube and if you have, whether you looked at instructions, did it by memory, or just “figured it out”. As soon as I get fast, I’ll time myself and leave it here as well. It’ll probably be like 4 minutes…
For a long time, I’ve wanted to make soap without buying those kits and “melt and pour” stuff. I know this method isn’t really making soap, but it’s still fun.
Ingredients:
Soap (yep, regular bar soap)
Scent (Herbs and oils do well)
Color (optional, but fun)
A baking spray (aka Canola oil, vegetable oil or similar releasing agent)
Water
Tools:
Mold (a candy mold, muffin tin, or even an ice cube tray will do!)
Bowl
Spoon
Grater
A microwave or double broiler
Steps:
Grate butter into bowl. The smaller the pieces, the better. ***DON’T LET YOUR SIBLINGS EAT IT. WARN THEM IT’S NOT CHEESE***
Spray mold with baking spray.
Add 1 cup of water for every 2 cups of soap.
Microwave your soap in 10 second intervals until it’s thick and smooth, stirring in between intervals.
Pour into your mold
Wait overnight. Pop it out of the mold. Wait 3-5 days til you use it so it doesn’t melt as soon it comes in contact with water.
VOILA!
Your ‘homemade’ soap is DONE. Well I guess you could say ‘home-scented’… because you didn’t really make it…
ALSO: I just finished molding (not unmolding) my soap, so I don’t really know if it’s gonna work out yet, but thought that it would be nice to share the thought… but I will leave the outcome in the comments below…
Mousse. A fancy, simple dessert. Somehow, I actually was able to make it without messing up. Despite that fancy French name, it’s basically just a puree/ganache and whipped cream. I looked it up, and “mousse” in French actually means “foam”.
Anyway, a couple days ago, I tried Dominique Ansel’s recipe for chocolate mousse. Miraculously, it worked out and I didn’t completely flunk (like I do with the simple stuff…). Only thing was, it was bittersweet chocolate and no sugar at all, so I had to whip up some whipped cream to top it. It was great and all, but I wanted to get deeper into the world of Mousse.
The day after, I was wondering what other flavors of Mousse I could try. I decided to google Strawberry Mousse. The first recipe that popped up was https://anitalianinmykitchen.com/strawberry-mousse/. I liked the recipe and thought I would take the idea of pureeing the strawberries and use Dominique Ansel’s recipe for measurements and stuff. Anyway, it worked:
Alright, so most of you saw my Meringue Mishaps post, right? Good, ’cause that story basically happened again yesterday. It started with a super-complicated super-exact recipe for kue semprit sagu, a tapioca cookie from Indonesia:
Kue Semprit Sagu
100 grams tapioca starch
50 millilitres sweet condensed milk
70 grams softened butter
Mix butter with sweet condensed milk.
Once combined, add Tapioca Starch slowly, in two additions. Mix until almost same consistency as a cookie dough.
Pipe with a star tip, and bake at 300 F for 15 minutes. DON’T USE PARCHMENT PAPER. BAKE DIRECTLY ON THE PAN FOR EXTRA CRISPINESS.
Super complicated, right? Seriously, I was sure there was NOTHING that could go wrong. But of course, something has to go wrong, because that’s the way I bake. Perfection cannot be repeated.
They’re cute little swirls!
First Attempt:
Like meringues, my first attempt was near to perfection. Only problem was, there were not enough. “I want a mountain of ’em. So much that I have to eat my way out!” Dad complimented. So I began mass production.
Second Attempt:
For the first attempt, someone had conveniently left out some butter so it became soft enough for me to use. It was only one stick, so after I used it, I had to soften my own for Mass Production. Unfortunately, I hadn’t figured out that the Microwave is evil to butter unless used with very short bursts (less than 5 seconds each). So decided to quadruple (x4) the batch. We didn’t have enough butter for that, so I had to defrost some as well. I made a mistake here. I decided that I would soften the butter from the fridge, then in a separate bowl do the frozen one. Well, the butter from the fridge turned out just fine, but because the second one was from the freezer, I thought that I should microwave it longer. So I did. I set the thing to 30 seconds and let it run. When I took the butter out, it was soft. So soft, that it had a pool under it. Yep, I half-melted it. That was the big mistake. It piped okay, and seemed fine until I baked it. After a couple minutes in the oven, butter was wetting the parchment paper. Not entirely sure why, but I think it has to do with all the butter and how the melted-butter didn’t like the heat or something. But I think the Evil Microwave was the biggest reason for this fail. So the cookies were fine, but not crispy enough. I used some of the batter (dough??) to stick the parchment-paper down to the pan, even though the original recipe didn’t call for parchment, but a greased pan. Anyway, the bit that was directly on the pan was way crispier than the one on parchment, so I noted that in the Semprit Sagu recipe.
This blog is all about my fails and success in baking, and I think I proved something yestereday:
It’s the SIMPLE ones I’ll mess up on. I can do fancy Creme Brulee and delicate Chocolate Mousse, but I can never underestimate a dessert.
It turn out yesterday was the Prancing Pony Club’s birthday. That means I created this site 2 years ago, yesterday. I’m going to pretend that I wrote this yesterday:
Two years. It’s been two years since I created the Prancing Pony Club. I was 9 when I finally convinced Dad to let me have a website, but I never thought it would really turn into a blog for writing. When we started the site, we clicked the option “blog” on WordPress’s site-maker-thingy. I thought it would just be a website for the Prancing Pony Club. My first post, Welcome horse-lovers! is something I would be embarrassed to read. (Please don’t click that link) Like my birthday-posts, it’s a reminder that the more I write, the better I’ll become. Something I wrote a year ago will not be the same as what I write now. It’ll be better. I’ll have better grammar, and less typos. I also never imagined that in the end, it has nearly nothing about horses. Maybe next year I’ll be blogging about BBQ. Who knows?
As you might know, I like watching the You Tuber, The Icing Artist. But I never had the chance to see if her recipes actually work. Mom was craving Brownies recently, so I found this was the perfect time to see if her recipes work. I knew she had a brownie recipe, but I wanted to know if her recipe worked, like Chelsweet’s cinnamon rolls, or if her recipes didn’t really work, like the first You Tuber I liked. (I don’t anymore.)
Today I really got to try out her recipes, and I was delighted with the results. Her recipe worked, mostly. Her brownie recipe, https://www.theicingartist.com/brownies, worked (as in, the brownies didn’t explode). It could have been me, and it probably was, but some of the brownies were really cocoa-y and too bitter. The other half was good and had a nice balance. If you try it out and have similar results, then it is DEFINITELY the recipe. But that’s OK. For most of the recipes I try (not all, but most) I change a little thing here or there. For example, even the cinnamon roll recipe, I tried filling the rolls with less or more filling to see the results. Surprisingly, the one with less filling turned out better (because it wasn’t too sweet). It might have been that she used sweetened cocoa and I used unsweetened, but I don’t really know. Anyway, this is the recipe: https://www.theicingartist.com/brownies.
Brownies
Ingredients:
2/3 cup melted butter
2/3 cup chopped chocolate
1/3 cup dutch process cocoa powder
1 cup white sugar
1/4 cup dark brown sugar
1 1/2 tsp vanilla
1 tsp salt
3 eggs
1/2 cup flour
1/2 cup extra chopped chocolate
Directions:
Combine 1/3 cup of chopped chocolate (or chocolate chips), and cocoa powder in bowl. Pour melted butter on top and stir until everything is melted and looking silky. Set aside to cool slightly
In a separate bowl, combine both sugars, vanilla, salt and eggs. Whip on high speed for six minutes until light and fluffy
Add in chocolate mixture and mix again until combined
Add in flour and remaining 1/2 cup of chopped chocolate, and fold into brownie mixture (Careful not to over mix!)
Pour batter into an 8” square pan and bake at 350F for 40 minutes
*Tip for extra fudgeyness take brownies out of oven at the half way point, and tap the pan on your counter like you do with cakes to get out the air bubbles.
After the first cookie sale, (which, as you might remember, was when we sold out) we decided to hold another sale a week later. I didn’t want to run out of meringues again, so I baked over 100 cookies. I was selling them in bags of 10 for a dollar, because they’re small. Guess what? They didn’t sell. Avery made some Peanut Butter and M&M Blondies, Isabel made some Sugar Cookies (which were hard as rock) and I made lots of meringues. Aubrey and I stood by the cookie stand and Avery and Isabel fiddled with the sign. I sold 2 bags of Blondies and some Sugar Cookies. That was all. I won’t go into detail about how many hours we waited for someone to stop by. I wondered why we weren’t selling, even though our product was still great. It might have been because nobody was actually sitting at the sign and we were eating all the cookies, or it might have been that nobody could see the sign, because they were driving too fast. Or it might just have been a bad day.
Although I didn’t know it at the time, sales were low because of the Coronovirus. I figured it out when Aubrey commented on this site a month later wanting me to email her about the stand.
And I replied explaining that the virus was the thing that made our sales low, along with a few other points, and told her that while the virus was going on I would make my parents and siblings fat.
And so I found this recipe and stuck true to my email . (Note*** Double the recipe if you want a nice, tall cake.***)
Cardamom Spiced Carrot Cake with Ginger Frosting & Caramel Drizzle
Preheat oven to 350°F. Grease and line three 6″ cake pans with parchment paper.
In a large bowl, mix together sugar, coconut oil, eggs, milk, and vanilla extract.
In a separate bowl, combine flour, baking powder, cardamom, ginger, cinnamon, and salt. Carefully fold dry ingredients into wet until mostly combined.
Fold in carrots and shredded coconut. Distribute batter evenly into prepared pans (1 1/3 cups of batter per pan).
Bake for 30 minutes, or until a knife inserted in the center of the cakes comes out clean. Allow to cool completely before frosting.
MAKE THE CARAMEL
Make the caramel while the cake is baking. In a medium saucepan, heat the sugar on medium-low heat for about 5 minutes. Use a spatula to occasionally stir the sugar, getting to the bottom of the pan.
Once the sugar is fully melted and turns a medium gold hue, remove from heat immediately and stir in butter. The mixture will violently bubble. Use your spatula to stir the butter and sugar until they melt together completely.
Next, pour in the heavy cream. Use your spatula to stir until everything is combined. Place back on the stove for about 30 seconds, stirring the whole time. Remove from heat and allow to cool for 15 minutes.
MAKE THE FROSTING
To make frosting, whip butter and cream cheese in a standing mixer on high speed for 1 minute. Lower speed and add in powdered sugar, ginger, salt, and vanilla extract, mixing until combined.
Place the first layer of cake onto a cake stand, then top with a heaping 1/2 cup of frosting. Spread to edges, smoothing evenly. Repeat with second and third layer.
Add remaining frosting to sides of cake, then use a cake scraper or flat cake knife to smooth frosting out around edges.
Pour caramel around outside crown of the cake, using a fork to help pull drippy bits down the cake. SERVE!
It turns out you can never say you’ve mastered something. It’s bad luck. No matter how many fails or how many successes, you can never be perfectly sure that you’ve mastered it.
Once upon a time, I made creme brulee and had a lot of whites left over. I really wanted to make something with the whites instead of letting Mom use them for scrambled eggs. After we googled some recipes, I decided to make meringue cookies. I added a little sugar, cream of tartar (is it pronounced Tar-tar, or TAR-ter?) and the egg whites. I beat them up with a hand mixer and made this fluffy, super light and supercalifragilisticexpialidocious (aka wonderful) meringue. I piped it out with a star tip, and baked them at 200 degrees F. I baked them for 50 minutes and they came out BEAUTIFULLY! They were crunchy if you chewed them and melt-in-your-mouth. Luckily, I saved some to bring to church for lunch, since it was Saturday when I baked them. People (aka the kids at church, because they were all gone by the time the grownups got them) loved them. One person (Lily) asked how I made them and I said “I beat egg whites, sugar, and cream of tartar and-” she stopped me right there and said “Oh, we can’t do that. My mom only buys brown eggs.” 🤣
Turns out, it was just chance that it turned out right.
The next time we made them, I decided to make a lot because we loved them so much last time. Instead of the hand mixer, I used the stand mixer. A number of things went wrong with this batch. First of all, I didn’t know that it had to be the whisk and accidentally used a paddle attachment! What an amateur mistake! Except, at that time, I was an amateur.
Because it wasn’t whipping, I thought I hadn’t added enough Cream of Tartar. So I added more. Another amateur mistake.(cream of tartar is an acid????) As you might expect, it became really sour!🤢 So I decided to make them lemon meringues! (Honestly, I didn’t know what lemon meringue pie was, so I didn’t know that the pie was lemon, not the meringue) So I squirted some lemon juice inside. And it became worse.
Luckily, my siblings don’t care as much about the sourness as I did, so they still ate them.
After googling more recipes, I found out that some meringues don’t use cream of tartar, so I changed my recipe. This worked out pretty well, but the meringue was foamy instead of creamy??!! I dunked it, but after googling some MORE, I found out that I just had to keep mixing! Frustrated with this simple dessert, I stopped trying meringues for a while.
What it should look like
A little like what mine looked like
Months later, I tried meringue again and somehow, it worked! 😲 No sourness, it was creamy, and supercalifragilisticexpialidocious. (I love that word!)
Soon after that success, our next-door-neighbor asked us to help her with her “bake sale” AKA a cookie stand set up in her front yard. I knew meringues took a long time to bake, but I also knew that if we were selling them, I better had bake a lot! Unfortunately, I hadn’t found out that meringue doesn’t last that well at room temp, and it becomes foamy and unpleasant. It can’t hold the star tip’s design or even stay in pretty little mounds. So I had only a few successful meringues, and that was the ONLY cookie stand bake sale that we ever sold out.
Well, after more and more googling, and more and more testing, I have still not perfected meringues. Did you know that if you haven’t baked them long enough, at room temp they’ll get all sticky and melt? This is my warning list for meringue:
Make sure you’ve got the whisk attachment!
Make sure that there’s NO yolk in your egg whites
DON’T PUT TOO MUCH CREAM OF TARTAR!
Make sure to bake them long enough, and at a really low temp. These bake low and slow! If you try to speed it up by firing up the oven to 350, you’ll end up with brown-ish meringues that are still gooey inside.
I realize that even though this blog is called The Prancing Pony Club, it has nothing to do with horses. Scrolling through the list of posts, I found that only a few actually were about horses. I’ve blogged about places we’ve went, books I’ve read, contests I made up, funny videos and favorite songs. I’ve blogged about what just happened in my life, stories I’ve come up with, DIYs that were only partly horsey. and more contests. But out of all the subjects I’ve written about, recipes were my favorite. (Actually, I also really enjoyed DIYs but I don’t do enough interesting projects to blog about.)
So I think I’ll be blogging about recipes for a while and see how it turns out. My dad said that my blog is for practicing my writing, so I need to write on this blog, not just type up recipes. I could write about restaurants I went to and learn to use more descriptive words for food rather than “delicious” and “so yummy” or “good”.
It isn’t official yet, but we’re just trying this out, okay?
I know I say the “best” a lot, but really, these are the best cinnamon rolls I’ve ever had. It takes a while to make, but theses were SO GOOD!! The middle is really fluffy, and…. it’s just so delicious. For a first time making them, it was a success.
These quick yeast cinnamon rolls are ready in 1 hour, and are soft and fluffy, with gooey centers! They’re frosted with a cream cheese icing that is to so delicious!!
PREP TIME: 15 minutes
COOK TIME: 25 minutes
ADDITIONAL TIME: 20 minutes
TOTAL TIME: 1 hour
Ingredients
Quick Yeast Cinnamon Roll Dough
3 1/2 cups all-purpose flour + up to 1/2 cup addition flour (added later in process)
1 Tablespoon cornstarch (optional, but helps the filling stay in place while the rolls bake)
Cream Cheese Frosting
1/2 cup full fat cream cheese (4 oz), room temperature
1/4 cup unsalted butter, room temperature
2 1/2 cups powdered sugar
1/2 tsp salt
2 Tbsp heavy cream
1 Tbsp vanilla extract
Instructions
Cinnamon Roll Filling
While the dough rises, make the cinnamon roll filling.
In a medium sized bowl, mix together 1 1/4 cups packed light brown sugar, 2 1/2 tablespoons ground cinnamon, and 1 tablespoon cornstarch.
Set aside.
Cinnamon Roll Dough
Preheat your oven to 200 degrees F.
In a large bowl or the bowl of a stand mixer, combine 3 1/2 cups of flour, 1 packet instant dry yeast, and 1 tsp salt.
In a separate bowl, add 1 cup milk, 1/4 cup softened butter, and 1/2 cup granulated sugar into a microwave safe bowl.
Heat on high power for 75 seconds, until the mixture is warm to the touch.
Stir to combine the ingredients.
Add 1/3 of the warm milk mixture into the flour mixture at a time, mixing on medium speed with a dough hook between additions.
Add in the beaten egg, and mix on a low speed until a sticky dough ball forms.
Continue to mix on a low speed for 2-3 minutes, until the dough becomes more elastic.
As the dough mixes, add additional flour, 1 Tbsp at a time until the dough begins to leave the sides of the bowl. I like to add in a Tbsp at a time, to get just the right amount.
Cover your bowl with plastic wrap, and set aside to allow the dough to rest for 5 minutes. The plastic wrap should fog up a bit from the warmth of the dough.
Place the dough on a lightly floured surface, and roll it into a large rectangle 10 inches x 18 inches. Is should be about 1/2 cm thick.
Spread 1/4 cup of softened butter over the dough, leaving 1 inch of dough on the long side of the rectangle uncovered (this will help you seal off the roll and keep it tight).
Sprinkle the cinnamon roll filling (instructions above) evenly over the buttered area.
Tightly roll the dough horizontally, toward the uncovered strip.
Cut dough log into 9 equal pieces (you can cut it into more pieces if you want smaller/shorter cinnamon rolls), and place in a greased square pan (mine is 8in x 8in).
Turn the oven off! I REPEAT, TURN THE OVEN OFF.
Cover the cinnamon roll pan with foil and place in a the oven for about 30 minutes (until the cinnamon rolls have risen).
Remove from the oven and take off the tinfoil. Turn the oven back on, and heat to 350 degrees.
Bake for 25 minutes, or until rolls are golden brown.
Cinnamon Roll Frosting
To make the frosting, stir together the softened 1/2 cup of cream cheese and 1/4 cup of butter with a spoon or stand mixer.
Add in the 1/2 tsp salt and 1 Tbsp vanilla extract.
Stir in 1 cup of powdered sugar, then add in the 2 Tbsp of heavy cream. Mix in the remaining 1 1/2 cups powdered sugar, and stir until the frosting is smooth.
Let the cinnamon rolls cool for 5 minutes, then spoon the frosting over each cinnamon roll.
Serve warm.
Notes
Making These Cinnamon Rolls in Advance:
If you want to make these quick yeast cinnamon rolls ahead of time, be sure to use regular yeast rather than instant yeast, and double the amount (some of the yeast may be damaged when frozen, so doubling the amount ensures your cinnamon rolls will rise properly). Freeze the cinnamon rolls after they have been cut and proofed in a greased pan.
Cover the cinnamon rolls with an airtight lid or plastic and freeze for up to a week. To thaw, take them out 2 hours before you plan to bake them, and then follow the recipe to bake.
If you want to make smaller cinnamon rolls, cut the rolled dough into 12 pieces.
Be sure you are using instant yeast! It comes in tiny packets that can usually be found in the refrigerated section of your grocery store.